Step 13 - Cryptonice
What is cryptonice ?
Cryptonice is a command-line tool and Python library that allows a user to examine for one or more supplied domain names:
the TLS configuration
certificate information
web application headers
DNS records
Cryptonice is built heavily upon the excellent SSLyze and Cryptography Python libraries.
You can find more information on how to use Cryptonice here : https://cryptonice.readthedocs.io/en/latest/

Note
The goal here, with NAP, is to examine all websites published by our CI/CD pipeline.
Steps for the lab
Warning
As we have only one website published, Arcadia Finance website, we will run tests with real public websites.
To do so, Cryptonice will run as a Docker container, and we will run a command inside this container. The command is
docker exec -dit cryptonice-gitlab sh -c "cd /home && cryptonice {{ fqdn }}"
The variable fqdn will be replaced by the FQDN you will set in the pipeline. For the demo, you will set manually this variable, but in a real world, this variable is set by the pipeline itself.
Steps
RDP to Windows Jumphost with credentials
user:userIn
Chrome, openGitlabtab or bookmark, and click onNGINX App Protect>CryptonicerepositoryIf you want, you can check the Gitlab CI pipeline and the Ansible playbook. To make it simple, Gitlab CI pipeline runs the ansible playbook
---
- name: copy content to ELK
  hosts: elk

  tasks:
  - name: delete all JSON in ELK
    shell: rm -f /home/gitlab-runner/crypto/*

- name: run Cryptonice
  hosts: localhost

  tasks:
  - name: Delete existing tests
    shell: rm -f /var/lib/gitlab-runner/crypto/*

  - name: Run cryptonice
    command: docker exec -dit cryptonice-gitlab sh -c "cd /home && cryptonice {{ fqdn }}"

  - name: WAIT
    wait_for:
    path: /var/lib/gitlab-runner/crypto/{{ fqdn }}.json

  - name: rename file
    shell: mv /var/lib/gitlab-runner/crypto/{{ fqdn }}.json /var/lib/gitlab-runner/crypto/{{ fqdn }}.bck

  - name: add EOL
    shell: awk '{printf "%s\r\n\r\n", $0}' /var/lib/gitlab-runner/crypto/{{ fqdn }}.bck > /var/lib/gitlab-runner/crypto/{{ fqdn }}.json

- name: copy content to ELK
  hosts: elk

  tasks:
  - name: copy JSON to ELK
    copy:
    src: /var/lib/gitlab-runner/crypto/{{ fqdn }}.json
    dest: /home/gitlab-runner/crypto/{{ fqdn }}.json
Note
As you can notice, running the command is not enough, we had to cleanup the environment and do some tricks so that ELK can read the outcomes. YES, all the outcomes will be readable in an ELK dashboard.
In the left menu, click on
CI / CDandPipelinesClick
Run Pipeline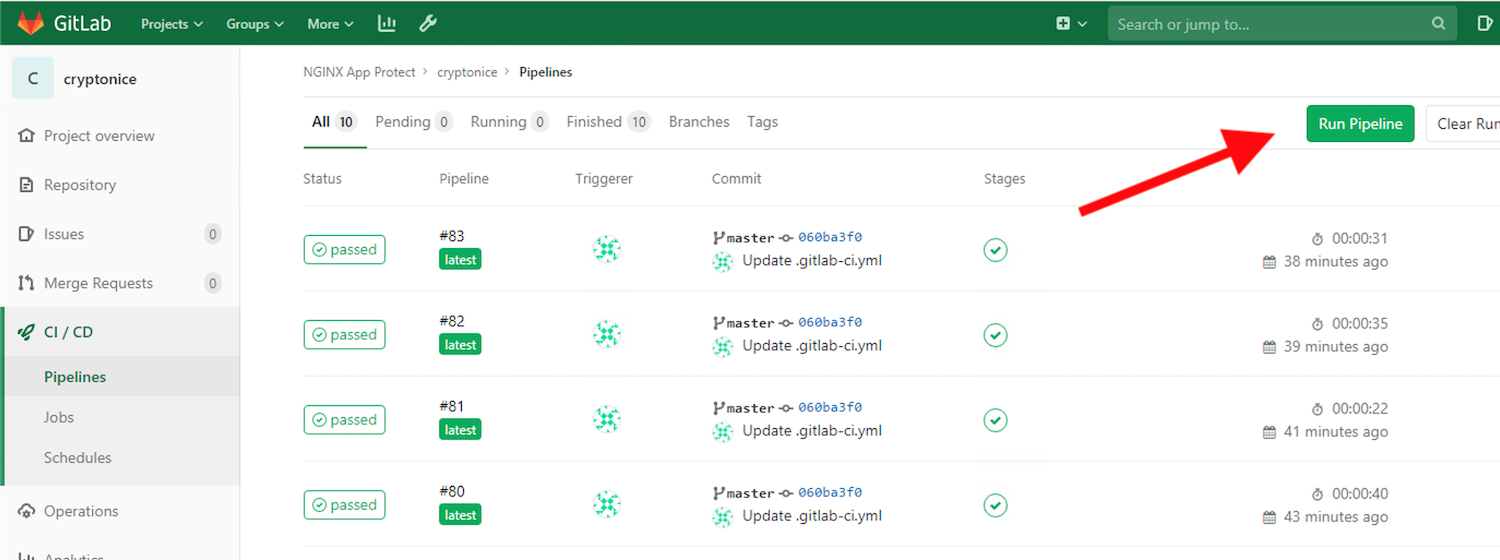
Define the variable
CI_FQDNwith any FQDN you want to test. Some websites like www.f5.com, or Facebook will raise some recommandations.
Click
Run Pipelineand Wait :)
The outcomes
Now, it is time to see the results and what we can do with the information provided by Cryptonice
You should still be connected to the Jumphost RDP
In
Chrome, openKibanaor use the Remote AccessELKin UDF if you prefer to connect from your laptop.In
ELKleft menu, click onDiscover
Then select
Demo-crypto*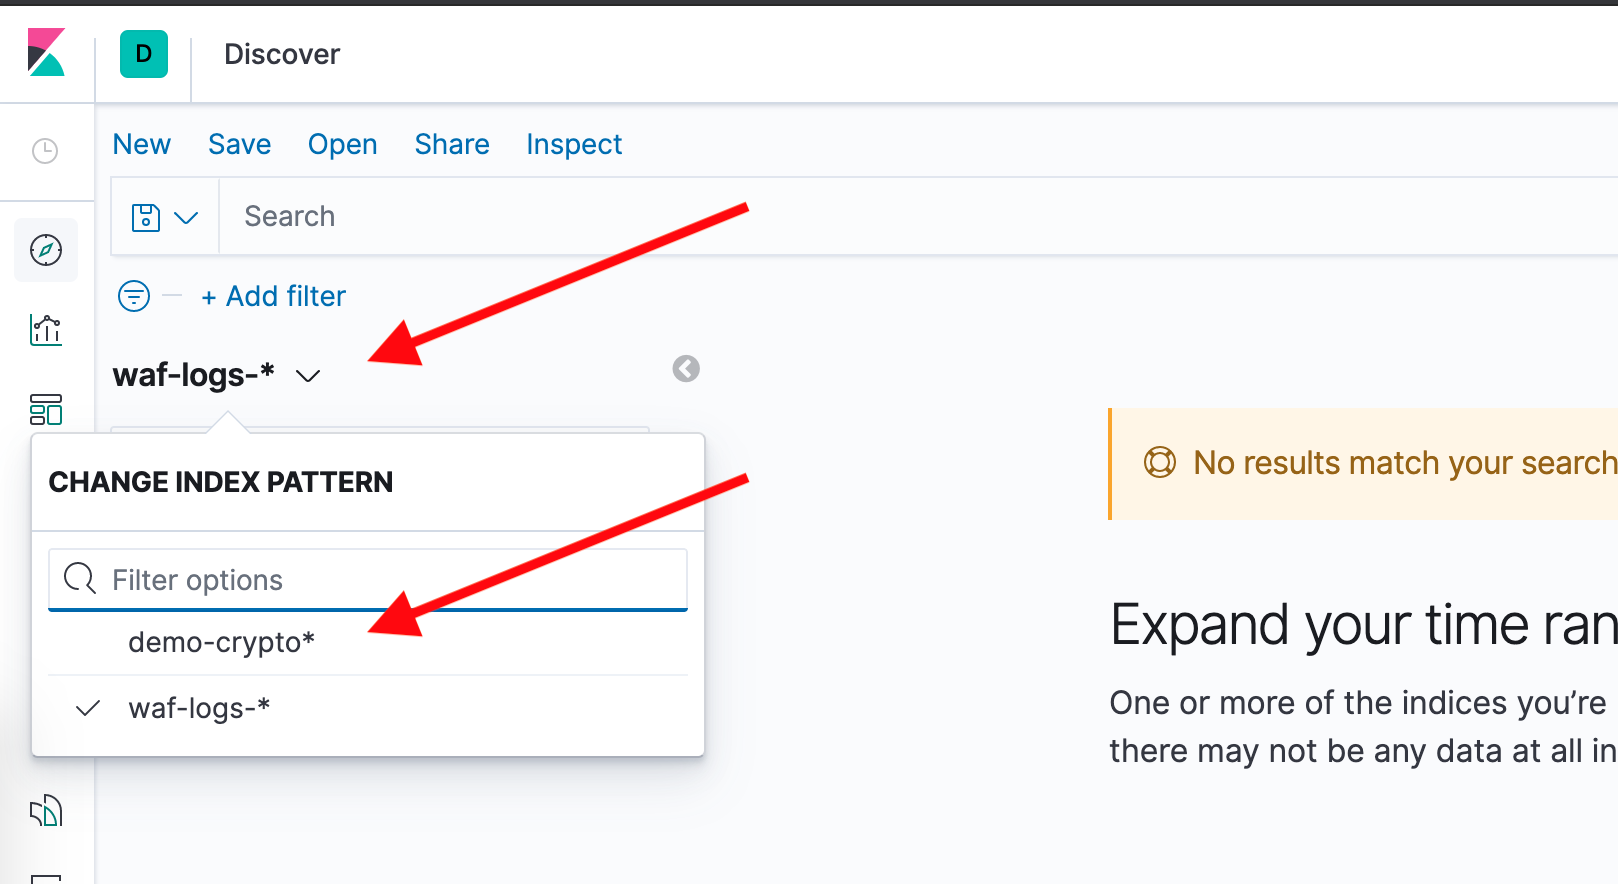
You should now see some logs. If not, change the time range on the top right corner. You can open a log and look at the content.
Now, go to the
Dashbboardsand click onCryptonicedashboard
Change the time range to
Last 1 yearso that you can see all tests done so far (I did some for you)You can see now an example of a
Cryptonicedashboard. Feel free to create your own.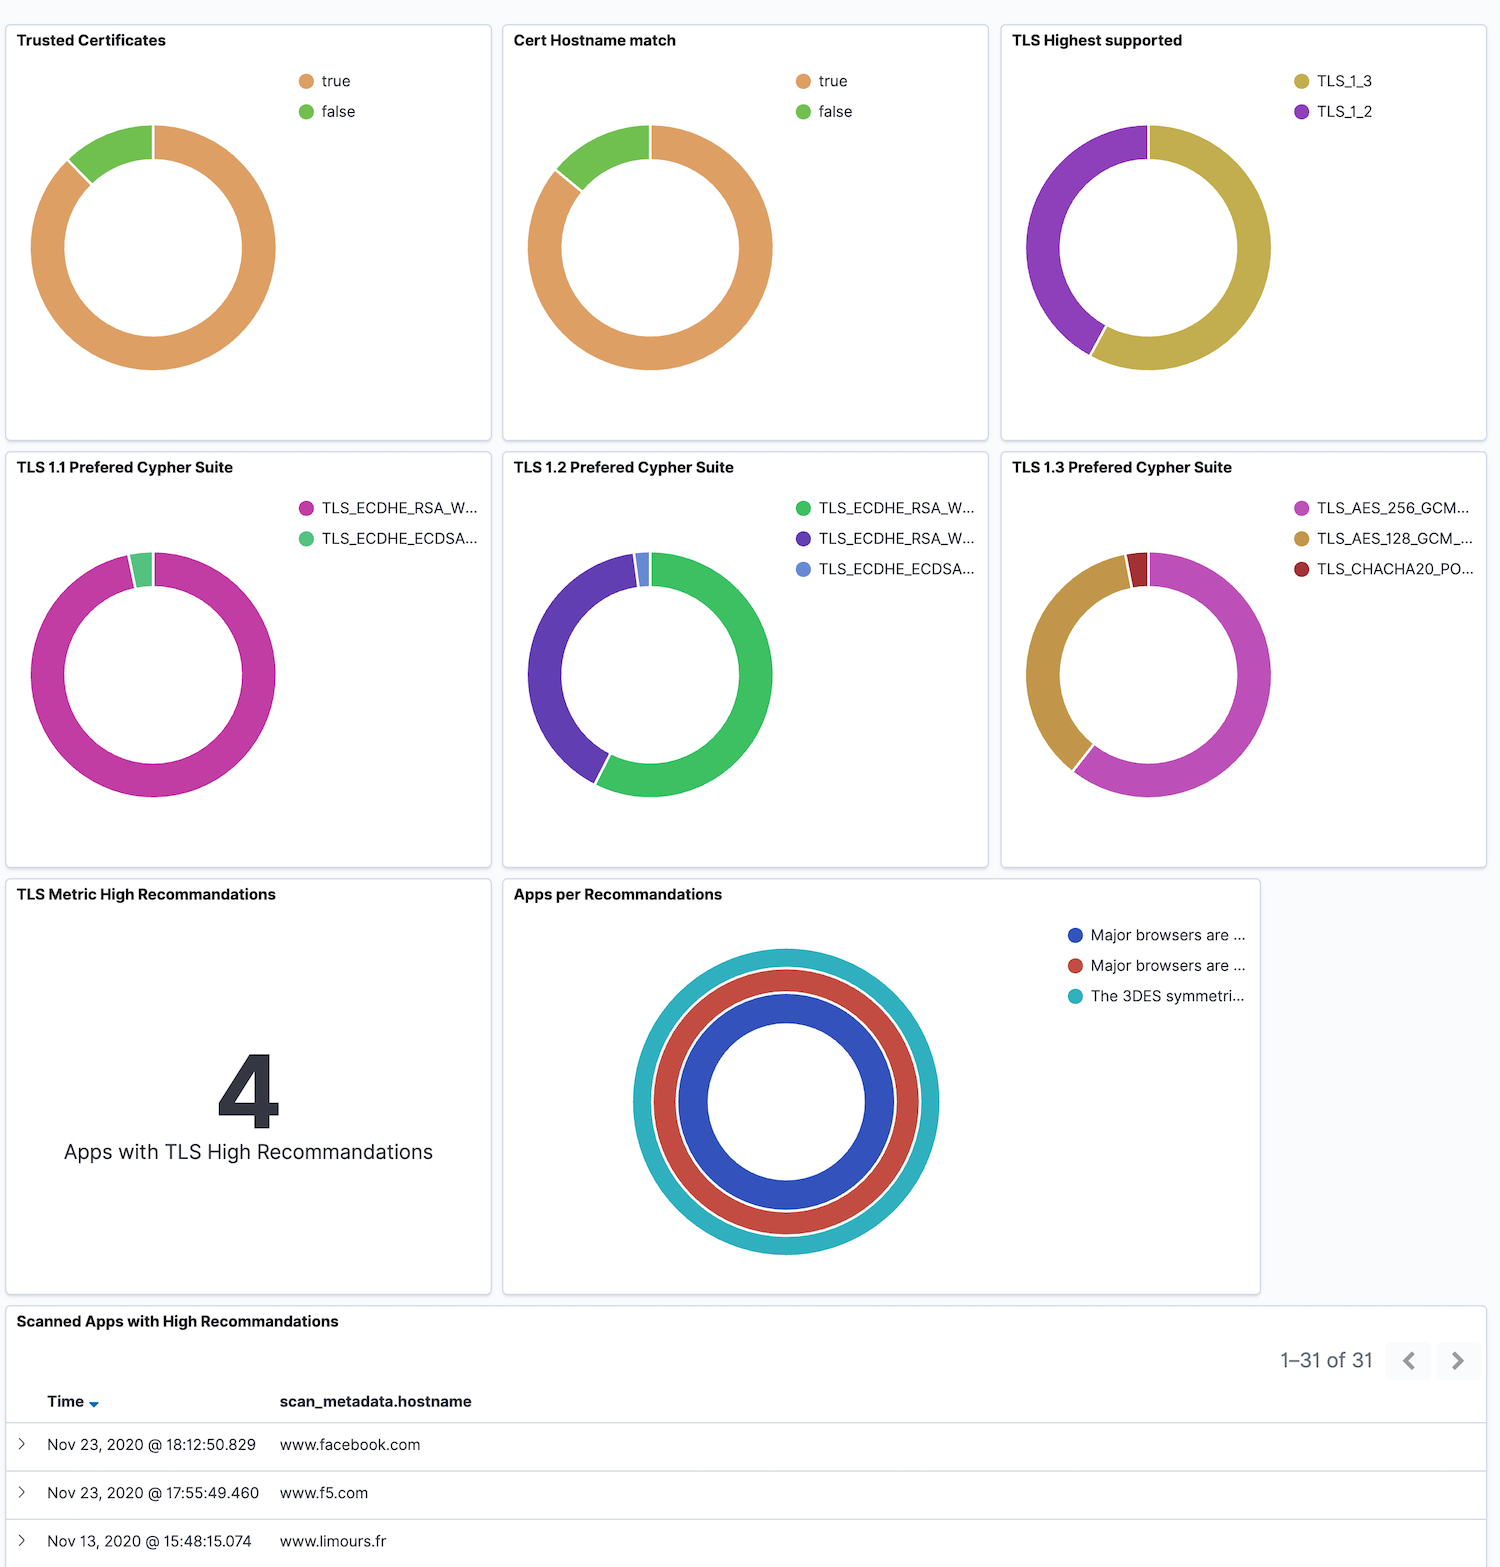
Note
In this Dashboard, you can see several information collected by Cryptonice. If the report contents High Recommandations, the website appears at the bottom and the widget is updated accordingly.
Note
Goal is to provide an easy and automated way for SecOps and DevOps to see their level of Security for TLS/HTTP/DNS Layers.