Step 4 - Update the Docker image with the latest WAF signatures
In this module, we will update the signature package in the Docker image.
Warning
There are several ways to update the signatures. All of them have pros and cons. In this lab, I decided to create a new Docker image with the new signature package to preserve immutability. And then destroy and run a new Docker container from this new image in front of Arcadia App.
The signatures are provided by F5 with an RPM package. The best way to update the image is to build a new image from a new Dockerfile referring to this signature package (and change the image tag). We will use the Dockerfile below:
#For CentOS 7
FROM centos:7.4.1708

# Download certificate and key from the customer portal (https://cs.nginx.com)
# and copy to the build context
COPY nginx-repo.crt nginx-repo.key /etc/ssl/nginx/

# Install prerequisite packages
RUN yum -y install wget ca-certificates epel-release

# Add NGINX Plus repo to yum
RUN wget -P /etc/yum.repos.d https://cs.nginx.com/static/files/nginx-plus-7.repo
RUN wget -P /etc/yum.repos.d https://cs.nginx.com/static/files/app-protect-signatures-7.repo

# Install NGINX App Protect
RUN yum -y install app-protect app-protect-attack-signatures\
   && yum clean all \
   && rm -rf /var/cache/yum \
   && rm -rf /etc/ssl/nginx

# Forward request logs to Docker log collector
#RUN ln -sf /dev/stdout /var/log/nginx/access.log \
#    && ln -sf /dev/stderr /var/log/nginx/error.log

# Copy configuration files
COPY nginx.conf log-default.json /etc/nginx/
COPY entrypoint.sh  ./

CMD ["sh", "/entrypoint.sh"]
Note
You may notice one more package versus the previous Dockerfile in Step 3. I added the package installation app-protect-attack-signatures
Follow the steps below to build the new Docker image:
SSH to Docker App Protect + Docker repo VM
Run the command
docker build -t app-protect:20200316 -f Dockerfile-sig .<– Be careful, there is a “.” (dot) at the end of the commandWait until you see the message:
Successfully tagged app-protect:20200316
Note
Please take time to understand what we ran. You may notice 2 changes. We ran the build with a new Dockerfile Dockerfile-sig and with a new tag 20200316 (date of the signature package when I built this lab). You can put any tag you want, for instance the date of today. Because we don’t know the date of the latest Attack Signature package.
Destroy the previous running NAP container and run a new one based on the new image (tag 20200316)
Check if the new app-protect Docker image is available locally by running
docker images. You will notice the new image with a tag of20200316.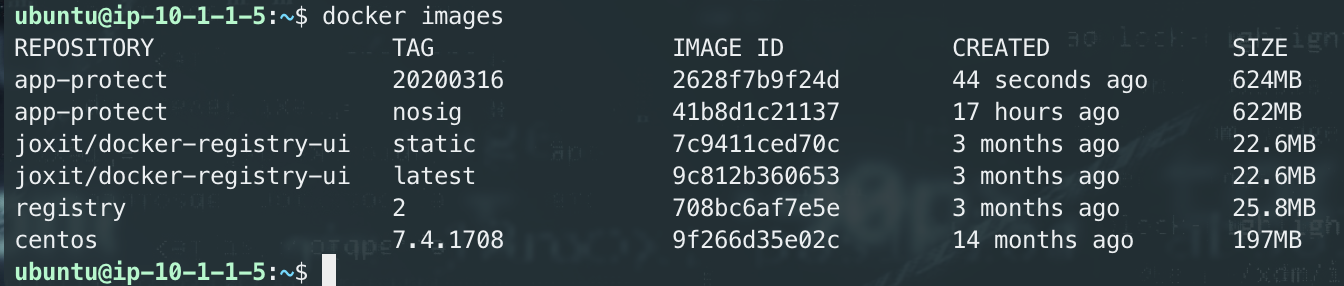
Destroy the existing and running NAP container
docker rm -f app-protectRun a new container with this image
docker run -dit --name app-protect -p 80:80 -v /home/ubuntu/nginx.conf:/etc/nginx/nginx.conf app-protect:20200316Warning
If you decided to change the tag
20200316by another tag, change your command line accordinglyCheck that the Docker container is running
docker ps
Check the signature package date included in the new Docker container
docker exec -it app-protect more /var/log/nginx/error.log2020/05/20 09:30:20 [notice] 12#12: APP_PROTECT { "event": "configuration_load_success", "attack_signatures_package":{"revision_datetime":"2020-03-16T14:11:52Z","version":"2020.03.16"},"completed_successfully":true}
Note
Congrats, you are running a new version of NAP with an updated signature package.
Video of this module (force HD 1080p in the video settings)
Note
You can notice some differences between the video and the lab. When I did the video, the dockerfile was different. But the concept remains the same.